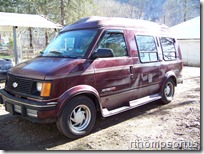
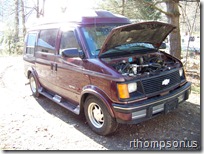
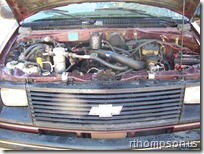
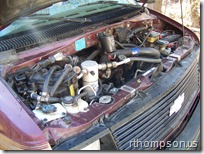
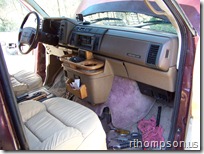
Pictures and Video of the Completed Diesel Astro Van
Been drivng the van for a week with no problems or issues. Everything is running good and smooth. The weather is good enough today that I brought it out and got some pictures and a video of the final product of this swap. Plus I put my notes here for anyone thinking of doing this swap letting you know what I learned doing it.
So here it is. It almost looks stock the way all the hoses and wires are ran.
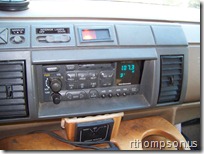
The last picture shows where I mounted the Glow Plug light and the Water in Fuel light. Those are the only things I needed to add to the dashboard.
Here is a video put together showing how it runs. It has more power and better mileage than the stock 4.3L engine. I am very happy with how it has turned out.
If anyone wants to do this swap here is what I recommend.
Get the factory service manual for your van and whatever van you get for the swap. Keeping them in the same year range will make life much easier. I did a 94 Astro and 94 G30. It is just way easier when you have a question to dig for a few minutes in the manuals than to have to search and ask questions on message boards.
There is probably no chance of getting the motor in the front so don't bother trying and just drop the subframe.
The V8 motor mounts will make things easier but you should still bolt the 6.5 to the stock trans and stock trans mount to get it all sitting square on the subframe. The starter will need a hole cut in the crossmember to keep from hitting. Also the oil pan is closer than it should be and rubs the crossmember just barely. So bend the front edge maybe 1/4 inch where it is close. When you test if it together you will see what I am talking about. Also bolt the starter on now. When it is in the van it is very hard to get to that little brace on the back. You must use that brace on a diesel or the starter will crack the engine block. Just run the battery wire to the front out of the way somewhere and as you are lowering the van connect the small starter wire. I have big hands though so if you have small hands it isn't quite that bad to get in after it is installed.
The stock trans mount can work just drill new holes and bolt it where the 4l80 puts it. One bolt will go right under the body bushing so I cut it to clear and welded on a small tab to get a second bolt in there. A flat head bolt would probably also work fine.
Before putting the subframe back on:
Take off the parking brake bracket and put the rear bolt back in and leave it a turn or so out from tight. Take the same bracket off the passenger side and toss it. The parking brake bracket needs the bolt hole notched so you can slip it over the bolt already in there. Also one side needs ground down to keep from hitting the crossmember and transmitting vibration. The crossmember sits directly over the rear bolt so if it isn't in there before the subframe is mounted it isn't going to go back easy. Just slip the bracket on and tighten it with a wrench after the subframe is installed.
The ABS module bracket needs cut and moved over an inch or so to the drivers side to get the module to clear the valve cover. Get it as close as you can to the steering without hitting anything else. This would probably be very hard to do after the motor is in without a plasma cutter or some way to cut it without cutting the firewall right under it. With the motor out it is an easy job to move.
After the parking brake bracket and abs module are adjusted then you can put the subframe back under it. The body just barely hits the drivers side injector lines so bend it slightly. As you lower it down you will see what needs adjusted. Don't get carried away and deform it though so the doghouse will still fit on easily.
The Astro Y pipe will work good enough with a slight tweak to get it to fit but it is kind of small so it should be replaced. Make sure the cat is off it or you wont get far before you break lots of expensive engine parts.
The wiring is going to be dependent on the years so that is why I say get the factory service manuals. They are cheap on ebay if you look around. But on a 94 it was pretty easy. Just keep the water temp wire and oil pressure wire and the single fuel level wire out of the engine harness. Everything else including the computer comes out. The 94 G30 computer goes in and all the colors match up to get it working as long as you have a pin out to see what wire is what. The non turbo 6.5 engines have no computer so they only need the glow plug power and the fuel cutoff solenoid wired to run. The 4l80e needs the computer and won't run without it.
Some G30 vans have a slip yoke on the trans and some have a bolt on. If it has a bolt on just order the slip yoke for one like a 97 short wheel base. Also you need a conversion U-joint to go from the stock driveshaft S44 to the yoke's 1350 size.
Overall it really isn't a hard swap. The wiring might scare some people but the required wiring is pretty basic. I don't think it is much harder than a 350 swap really. I figure it would probably take only slightly longer than a 350 swap. Most of the extra time is just the other stuff like changing the fuel tank pickup tube out and sorting out the wiring to keep it looking factory. Getting that split loom stuff on it takes some patience.
